Introduction
In this article, you will learn about the role of digital signatures in digital forensics, their importance in ensuring data integrity, and the methods used to examine and verify them. We will provide a step-by-step guide on how to conduct a forensic examination of digital signatures, explore relevant tools, and discuss practical applications in real-world scenarios.
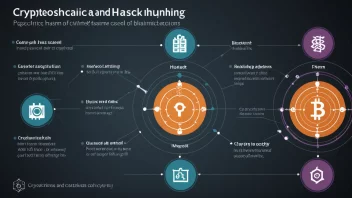
Step 1: Understanding Digital Signatures
Digital signatures are cryptographic techniques used to validate the authenticity and integrity of digital messages or documents. They leverage asymmetric cryptography, which employs a pair of keys: a public key and a private key. Here’s what you need to know:
- Public Key: This key is shared openly and is used to verify the signature.
- Private Key: This key is kept secret and is used to create the signature.
When a sender signs a document with their private key, a hash of the document is created and encrypted. The recipient can then use the sender’s public key to verify that the signature is valid and that the document has not been altered.
Step 2: Gathering Forensic Tools
Before conducting a forensic examination, it’s crucial to gather the right tools. Some commonly used tools in digital forensics include:
OpenSSL: A robust tool for handling SSL/TLS and cryptographic functions.Gpg4win: A Windows tool for email and file encryption that supports digital signatures.FTK Imager: Useful for creating forensic images of drives where digital signatures may be found.
Ensure you have the necessary permissions and that you are compliant with legal standards when using these tools.
Step 3: Collecting Evidence
Correct evidence collection is vital in digital forensics. Follow these steps:
- Identify: Determine where digital signatures are stored (e.g., email attachments, documents).
- Preserve: Create a forensic image of the storage medium using tools like FTK Imager to avoid altering the original data.
- Document: Keep a detailed log of your actions during the evidence collection process.
Step 4: Analyzing Digital Signatures
Once you have collected the evidence, it's time to analyze the digital signatures. Here are the steps:
- Extract the Signature: Use OpenSSL or Gpg4win to extract the digital signature from the documents.
- Verify the Signature: With the public key, verify the signature against the document hash to confirm its authenticity.
- Check the Certificate: If applicable, examine the digital certificate to ensure it has not expired and is issued by a trusted certificate authority.
Step 5: Reporting Findings
Documentation is a critical aspect of forensic examinations. Your report should include:
- Introduction: Brief overview of the investigation.
- Methodology: Describe the steps taken during the examination.
- Findings: Present the results of your analysis and any discrepancies found.
- Conclusion: Summarize the implications of your findings.
Step 6: Legal Considerations
Digital forensics often intersects with legal issues. Consider the following:
- Chain of Custody: Maintain an unbroken chain of custody for all evidence collected.
- Legal Compliance: Ensure your methods comply with relevant laws and regulations.
- Expert Testimony: Be prepared to present your findings in court if required.
Conclusion
In this guide, you’ve learned how to conduct a forensic examination of digital signatures. By understanding the fundamentals, gathering the right tools, collecting evidence, analyzing signatures, documenting your findings, and considering legal implications, you can effectively contribute to the field of digital forensics. Implement these steps carefully, and always stay updated with the latest practices in digital forensic analysis.